Homemade Quick Puff Pastry Sheet Recipe | Perfect For Puffs, Tarts & Pies
Have you ever tried making your own puff at home with homemade puff pastry? Here is a quick and simple recipe of how you can make a homemade puff pastry and create delicious dishes of it.

This Quick puff pastry recipe came after a lot of research and trials on what how to make it simple and yet flaky crispy and delicious with easy ingredients like flour, salt and butter. Here is a quick and simple recipe of how you can make a homemade puff pastry and create delicious dishes of it.
1440 M
0 M
1440 M
2 puff pastry sheets
Ingredients
- 330 grams All Purpose Flour (Maida) , more for flouring and dusting hands, surface and dough
- 2 teaspoons Caster Sugar
- 1.5 teaspoons Salt
- 340 grams Butter (Salted) , chilled and chopped into 3/4 inch pieces
- 120 ml Chilled water , approx or more
How to make Homemade Quick Puff Pastry Sheet Recipe | Perfect For Puffs, Tarts & Pies
To begin making the Quick Puff Pastry Recipe Sheet for making puffs, measure all the ingredients and keep them ready.
Add flour and salt to a large mixing bowl and give a quick stir to combine it. Add the large cubes of butter into the flour mixture.
Ensure each piece of butter is coated fully into flour. When it is coated in flour it will be less likely to melt and also less likely to melt out of the dough later when we roll to make the sheets.
This process of covering the butter with flour is called lamination of the butter with flour. If it is not laminated well, the butter will melt out of the dough and you will end up with a puff that is not flaky.
Next, squish up the cubes of butter coated with flour by pressing between your fingers. Like shown in the image above.
Once all the pieces are squished, just toss them in flour once again. You need to ensure all the butter pieces are well coated with flour.
Make a well in the center and add little ice water at a time and then adding more if required a tablespoon at a time. Because every single brand of flour absorbs moisture differently, we need to ensure we add that water little at a time.
To mix the water in, toss the flour into the water and it helps the water get incorporated to form the dough without kneading. Do not knead the dough, as it can activate too much gluten.
When it gets to a stage where the puff pastry dough forms large clumps, you can knead a little to understand how much more moisture is needed to bring the dough together without breaking those butter shingles. Add a few tablespoons of water if needed again to bring the dry flour together to form the dough.
It is important to get the dough to the right hydration level. If it becomes too wet, then the dough will become sticky and might not be the best thing for puff pastry.
Gently press and bring the flour together to form a dough without kneading. It is important to work as quickly as possible. If you take too long and knead too long the heat from your hands will melt the butter and make it sticky.
We need to ensure that the butter is still in big pieces in the dough after bringing it together.
The dough will look rough and not smooth and you will be able to see the big chunks of butter and will not look totally smooth.
Divide the dough in two halves and roll it out using your hands until it’s about 1 inch thick and is about a 5×8 inch rectangle. Fold the dough half way to the centre, the other half over this fold like as if you were folding a business letter. Use your hands to gently flatten and smooth out any cracks in your dough.
Wrap each disc of dough in a plastic/ cling film wrap and refrigerate for at least two hours to 24 hours. Based on the warmth and the humidity of the region, a minimum two hour will allow the dough to rest before we begin the folds to make the puff pastry sheet.
After two hours, remove the dough from the refrigerator.
Dust the working surface with very little flour.
Open one of the discs while the other is still in refrigeration.
First Round
Roll out the dough into a rough rectangle shape to about 1/2 inch thickness. The dough will be tough, so use a little muscle to roll it out. If the dough has been chilled for longer than about 3 hours, it’s likely very stiff so let it rest for about 5 minutes before you begin rolling.
If you feel the dough is sticky with butter, sprinkle a little bit of flour in the area where the butter feels sticky. Ensure you dust off any excess flour.
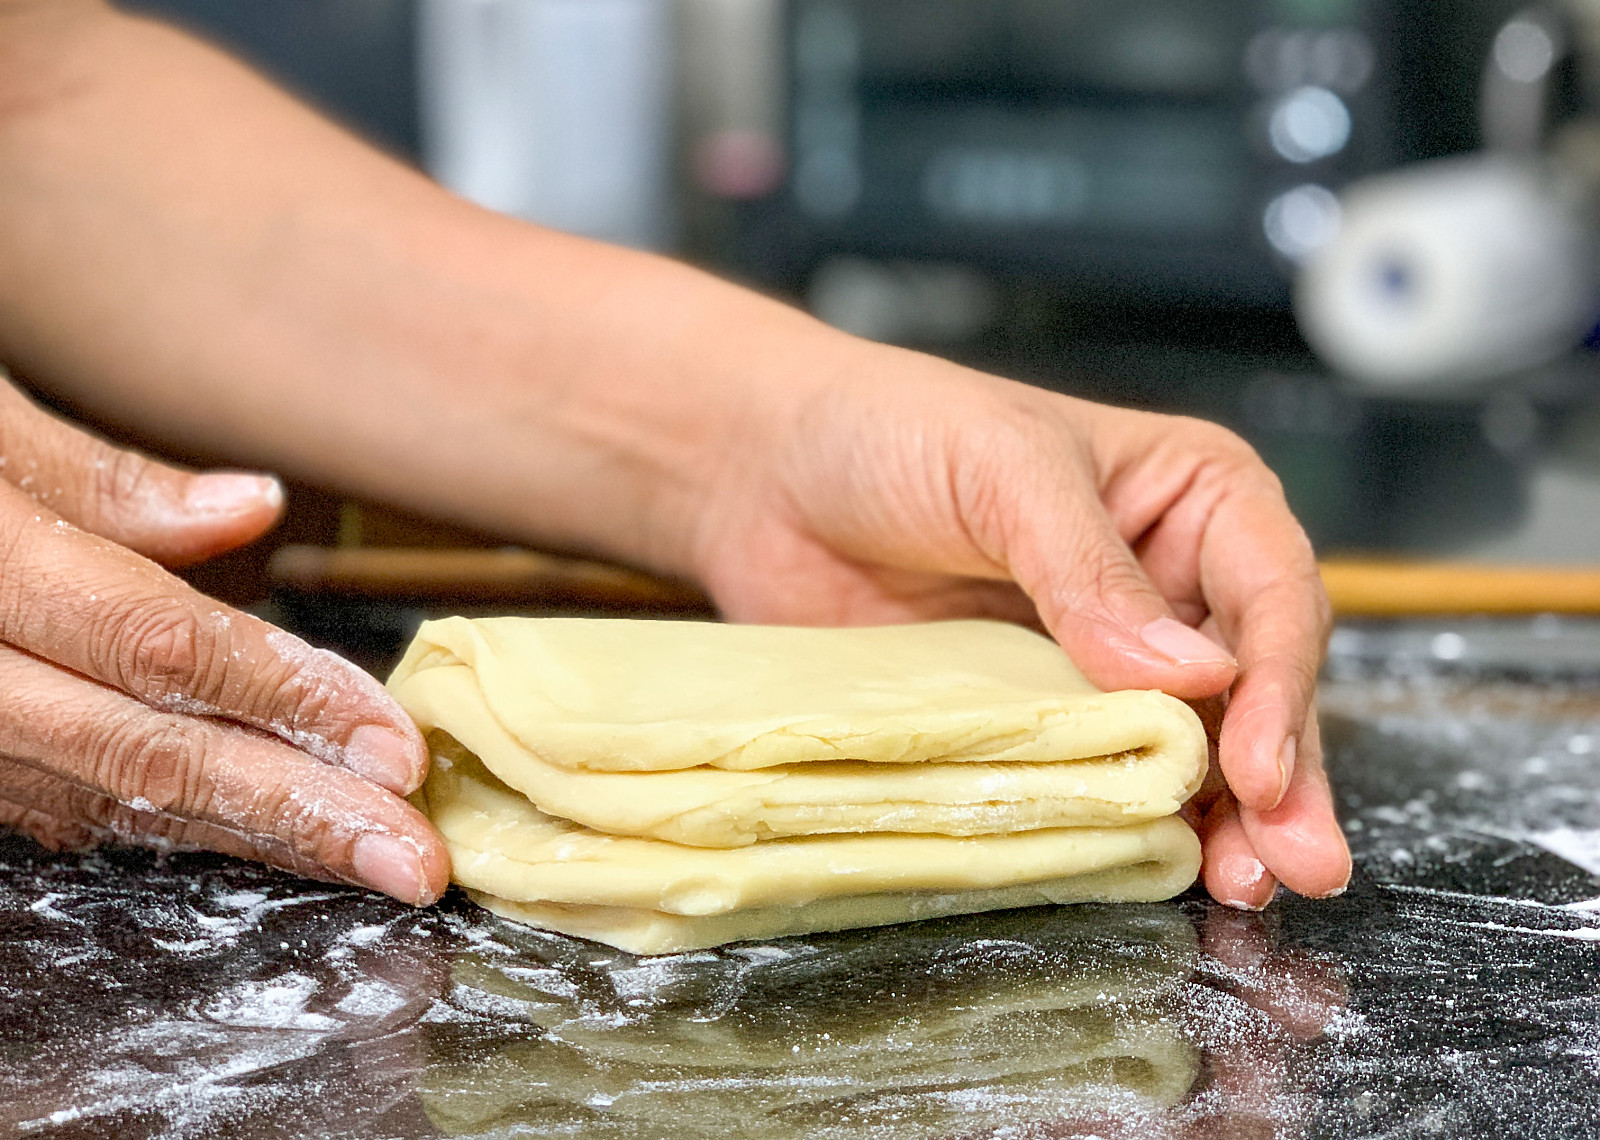
Once you have rolled it into a 1/2 inch thick rectangle about 6 inch wide and 12 inch length, As you roll, it’s best to flip the dough over once or twice to make sure it’s not sticking to your work surface and flour the surface well. Fold the dough into half and then fold the half into a quarter again. This is the first fold.
Dust a little flour if required and roll into a 1/2 inch rectangle again and then do the folds (first into half and then again fold the half into a quarter). Continue this process another 4 more times.
Wrap this dough the same cling wrap and refrigerate for at least one hour until the dough is firm.
Second Round
After an hour, repeat the process mentioned in the first round again.
Once you are done with at least 2 rounds of rolling, folding and chilling process, the puff pastry dough is ready. You need to ensure you refrigerate the puff pastry dough for at least 6 to 8 hours before you are ready to use it to make puffs, tarts and more. You can also freeze the dough at this point.
These puff pastry sheets can be stored in the freezer for up to 3 to 4 months. When you are ready to use them, thaw for 15 to 20 minutes at room temperature and begin using it for the recipes.


